A Content Delivery Network (CDN) can help you make your website load quickly anywhere in the world. CDNs provide local infrastructure across the world, so your visitors can fetch data quickly from a nearby data center instead of from a different continent.
This article first takes a closer look at the concept of CDNs. What they are exactly, what type of content you can serve on them, and when do they deliver the most value? Then we go through how exactly to use a CDN like Cloudflare to improve your web performance.
What is a CDN and how does it work?
You already know that a CDN is a network of servers distributed geographically, but let’s explore the idea in a bit more depth.
When operating a website your IT team has likely set up a web server that can send responses to requests sent by the browser of your website visitor. This location stores all website assets and your database. It is called the origin server because it is where your website content originates. If you want to make changes to your content you do it here first.
However, your origin server may be far away from some of your visitors, and this is where Content Delivery Networks come in. CDNs provide edge servers across the world and users can load your content from a server that's close to them instead of connecting to your origin server. Your origin server is at the center of this network, while the edge nodes are at the outer edge of it.
You configure your domain settings to direct traffic to the CDN. If the CDN node that handles the request already has a cached version of the content then it can quickly return that. Otherwise it requests the content from your origin server, serves it to the visitor, and then stores it at the edge for future use.
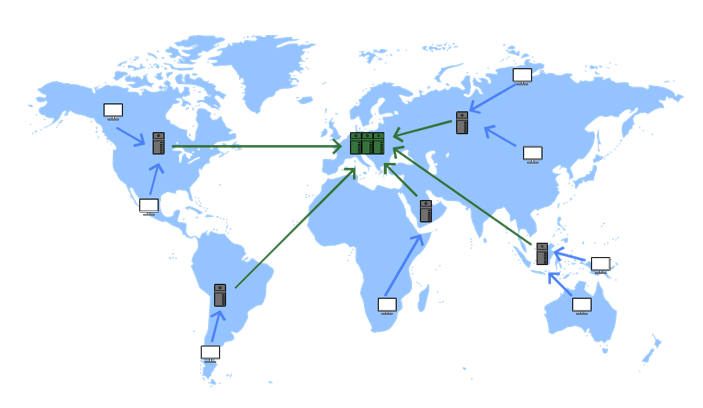
The diagram below is a simple visual representation of a CDN. The green server icon is the origin server, the gray server icons are edge servers in the network, and the monitor icons are users accessing your website.
How Content Delivery Networks improve page speed
Content Delivery Networks can benefit page performance in a few different ways:
- Reducing network round trip latency
- Serving cached content and reducing load on your server
- Optimizing your content
Different CDNs have different levels of HTTP priority support, which can impact how efficiently resources are delivered to users.
Reduce latency by leveraging global infrastructure
Data takes longer to reach your users the longer the distance it has to travel is. For example, a typical network round trip between Paris and Auckland in New Zealand can take 291 milliseconds.
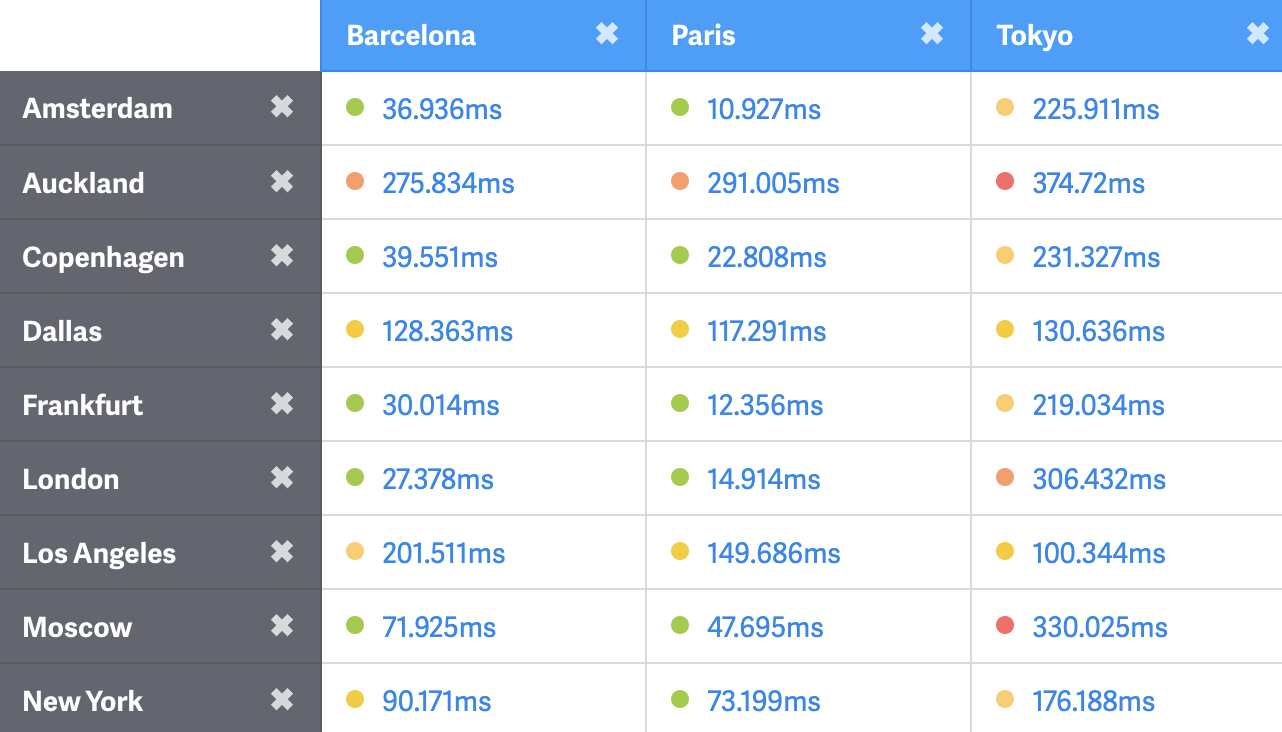
CDNs reduce this round trip time, often down to just a few milliseconds. Instead of connecting to your origin server the end users connect to edge servers located around the world. Connecting to a server and loading a website resource typically takes 4 round trips on the network, so using a CDN can save hundreds of milliseconds.
Using a CDN improves performance even if the resource still needs to be loaded from the origin server, since establishing the initial server connection still takes place at the edge node. Only the actual request for a website resource like an image or HTML document still needs to be routed to the origin server.
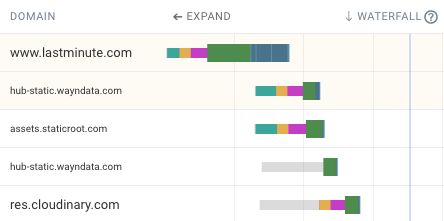
You can see an example of server connections in this waterfall chart. The teal, orange, and purple parts of each request bar show the network round trips required for the DNS lookup, TCP connection, and SSL connection.
Serving cached content and reducing load on your server
When an edge node has received content and caching is enabled, then the edge node will store that content for future use. If another user requests the same resource then it is served directly from the edge node without involving the origin server.
Serving cached content also means that the overall load on your origin server is lower, which means it responds more quickly when content needs to be loaded from it.
CDNs often also provide protection from Denial of Service (DoS) attacks. With these attacks a large number of requests is made to slow down or crash your website server. However, CDN providers tend to be better equipped to deal with these issues and reject these requests instead of overwhelming your server.
Automatically optimizing content
In addition to serving content from locations across the world and caching content, many CDNs also provide options to optimize the content provided by your origin server before it is served to the end user.
For example, your origin server may provide a large PNG image file but the end user's browser also supports the modern WebP format. The CDN can automatically convert the image to WebP, save bandwidth, and allow the visitor to load the image more quickly.
Some CDNs provide even more advanced optimizations, like automatically loading low-priority JavaScript code asynchronously or automatically applying certain HTTP headers to enable page prefetching.
How to check if a CDN is working or not
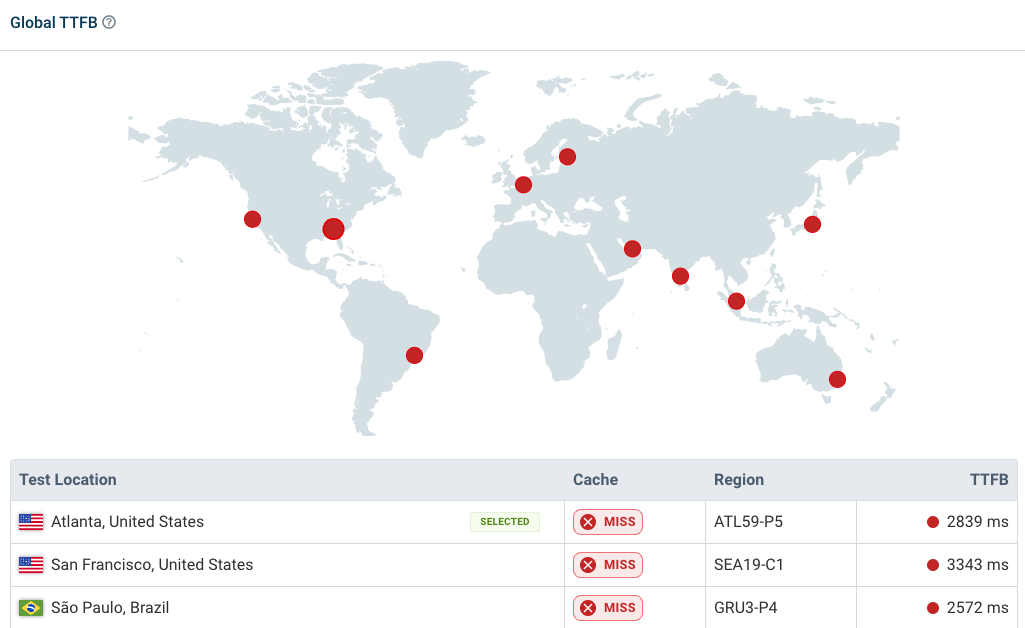
Setting up a CDN means that your website will load faster for visitors across the world. Run a CDN Performance Test to see how fast your website is for users in different locations.
You can also see the name of the server that's responding, whether cached responses are served, and what region the request is routed to.
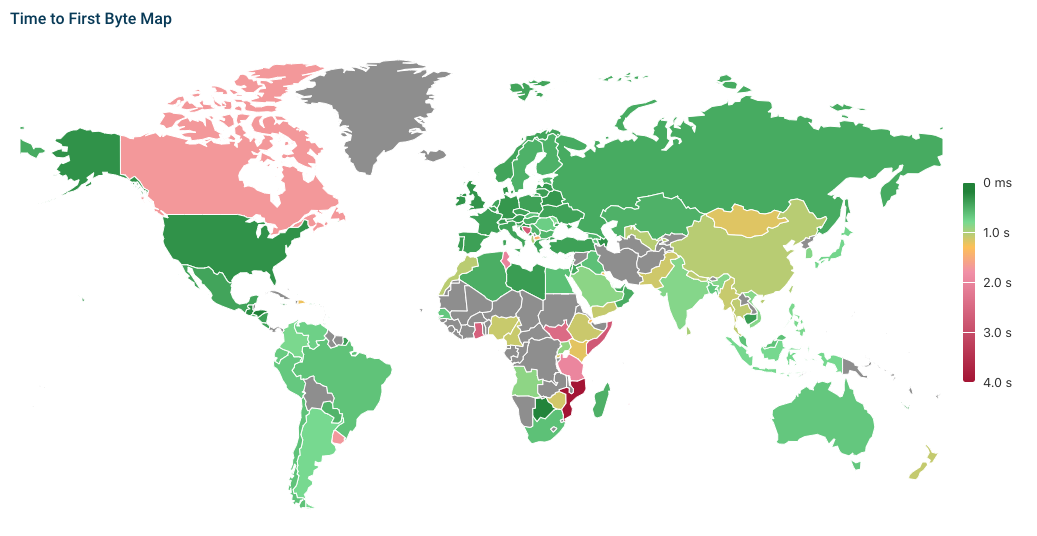
You can also use real user monitoring to measure Time to First Byte and Core Web Vitals for all your visitors. That way you'll have a country-by-country breakdown showing you how fast your website loads.
About the 'Use A Content Delivery Network (CDN)' audit in GTMetrix
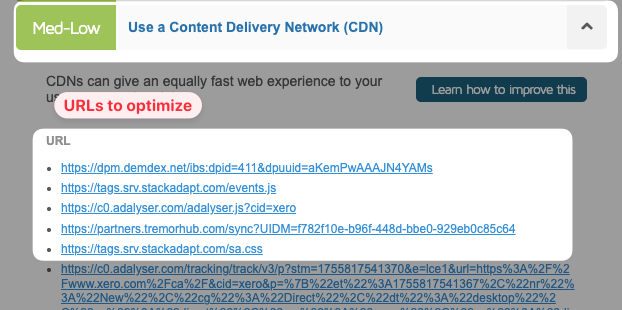
If you've run your website through GTmetrix, you may have encountered the recommendation "Use a Content Delivery Network (CDN)" in your performance report.
This is a custom audit that GTmetrix added to their implementation of Google Lighthouse. The more resources that are not detected on a CDN (including images, CSS files, JavaScript files, and fonts) the greater the impact on your Structure Score.
Why you might see this recommendation
Even if you've set up a CDN, you might still see this recommendation because:
- GTmetrix doesn't recognize your CDN provider
- Some resources are still served from your origin server
- Your CDN isn't properly configured for all static assets
How to address it
To resolve this audit:
- Implement a comprehensive CDN: You can follow the Cloudflare setup instructions below to ensure all your static assets are served through a CDN
- Verify detection: If you're using a popular, well-known CDN, GTmetrix will probably auto-detect it. Run another test after implementation to confirm the audit passes.
- Specify custom CDNs: If GTmetrix doesn't automatically recognize your CDN, you can add your CDN domains on your account page. Look for the 'CDN Hostnames' box in the Analysis Options section.
Limitations of Content Delivery Networks
While CDNs have a lot of advantages there are also some possible downsides and performance issues that they can't address.
For example, caching may work against you if it’s imperative that your application delivers live data. Your users will still be able to connect more quickly, but the data ultimately always needs to be loaded from the far-away origin server.
That is not to say that CDNs can’t still be effective with this sort of data. For example, with Cloudflare Workers, you can deploy serverless code functions through their CDN, essentially moving dynamic content to the edge.
CDNs can also complicate caching, since if you need to clear the cache after a content change then you need to do this in the CDN cache as well.
If your site attracts users from roughly the same location on a map, a CDN may simply be a wasted expense. If your site doesn’t get much traffic in the first place cache misses at the edge will be more likely and you also won't get the full benefits of caching, unless you prewarm the edge caches.
Step-by-step instructions on using Cloudflare to improve performance
In this section, you'll learn how to set up the Cloudflare CDN for a demo website that includes HTML, CSS, images, and JavaScript. You'll also learn how to set up Cloudflare Workers to extend the advantages of CDNs to dynamic web applications.
Setting up Cloudflare
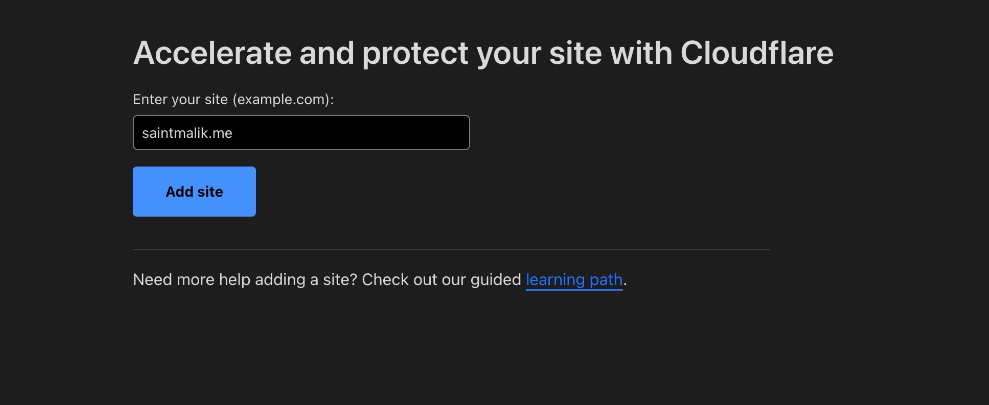
Create an account on Cloudflare, if you don't already have one, and verify your email address. To add your website to Cloudflare, enter your site's URL and click Add site.
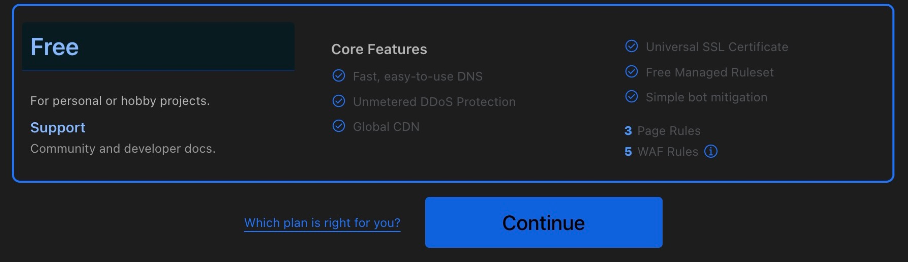
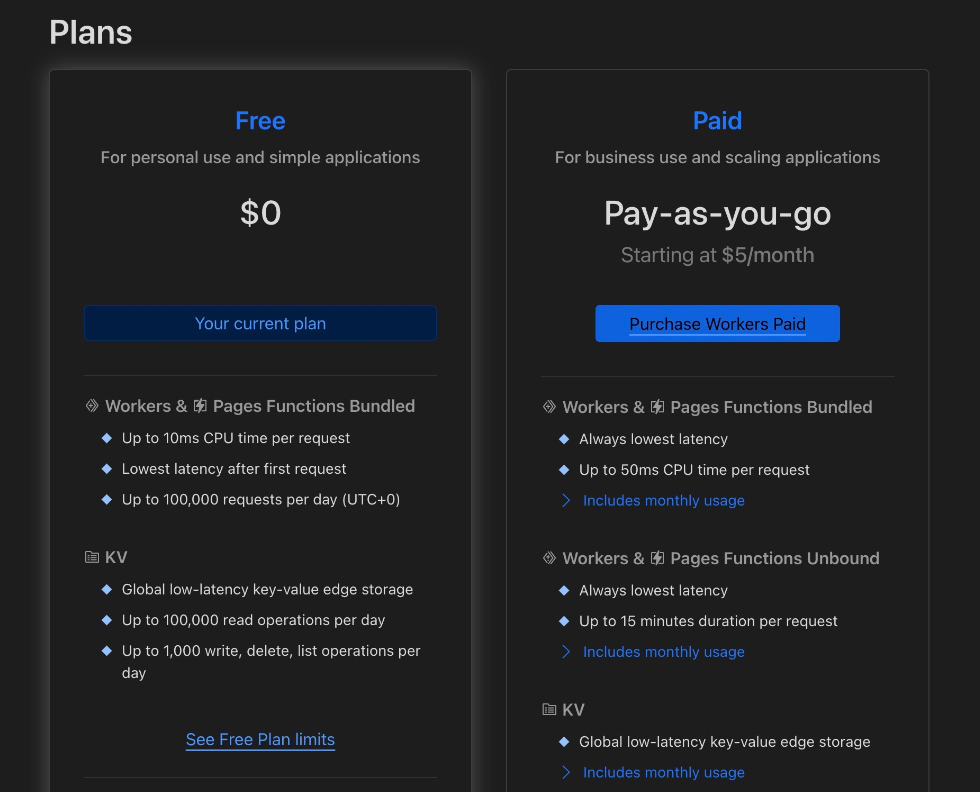
On the next screen, select the subscription plan you want to use. You can select the free plan to start, which includes a free global CDN, SSL encryption, and more.
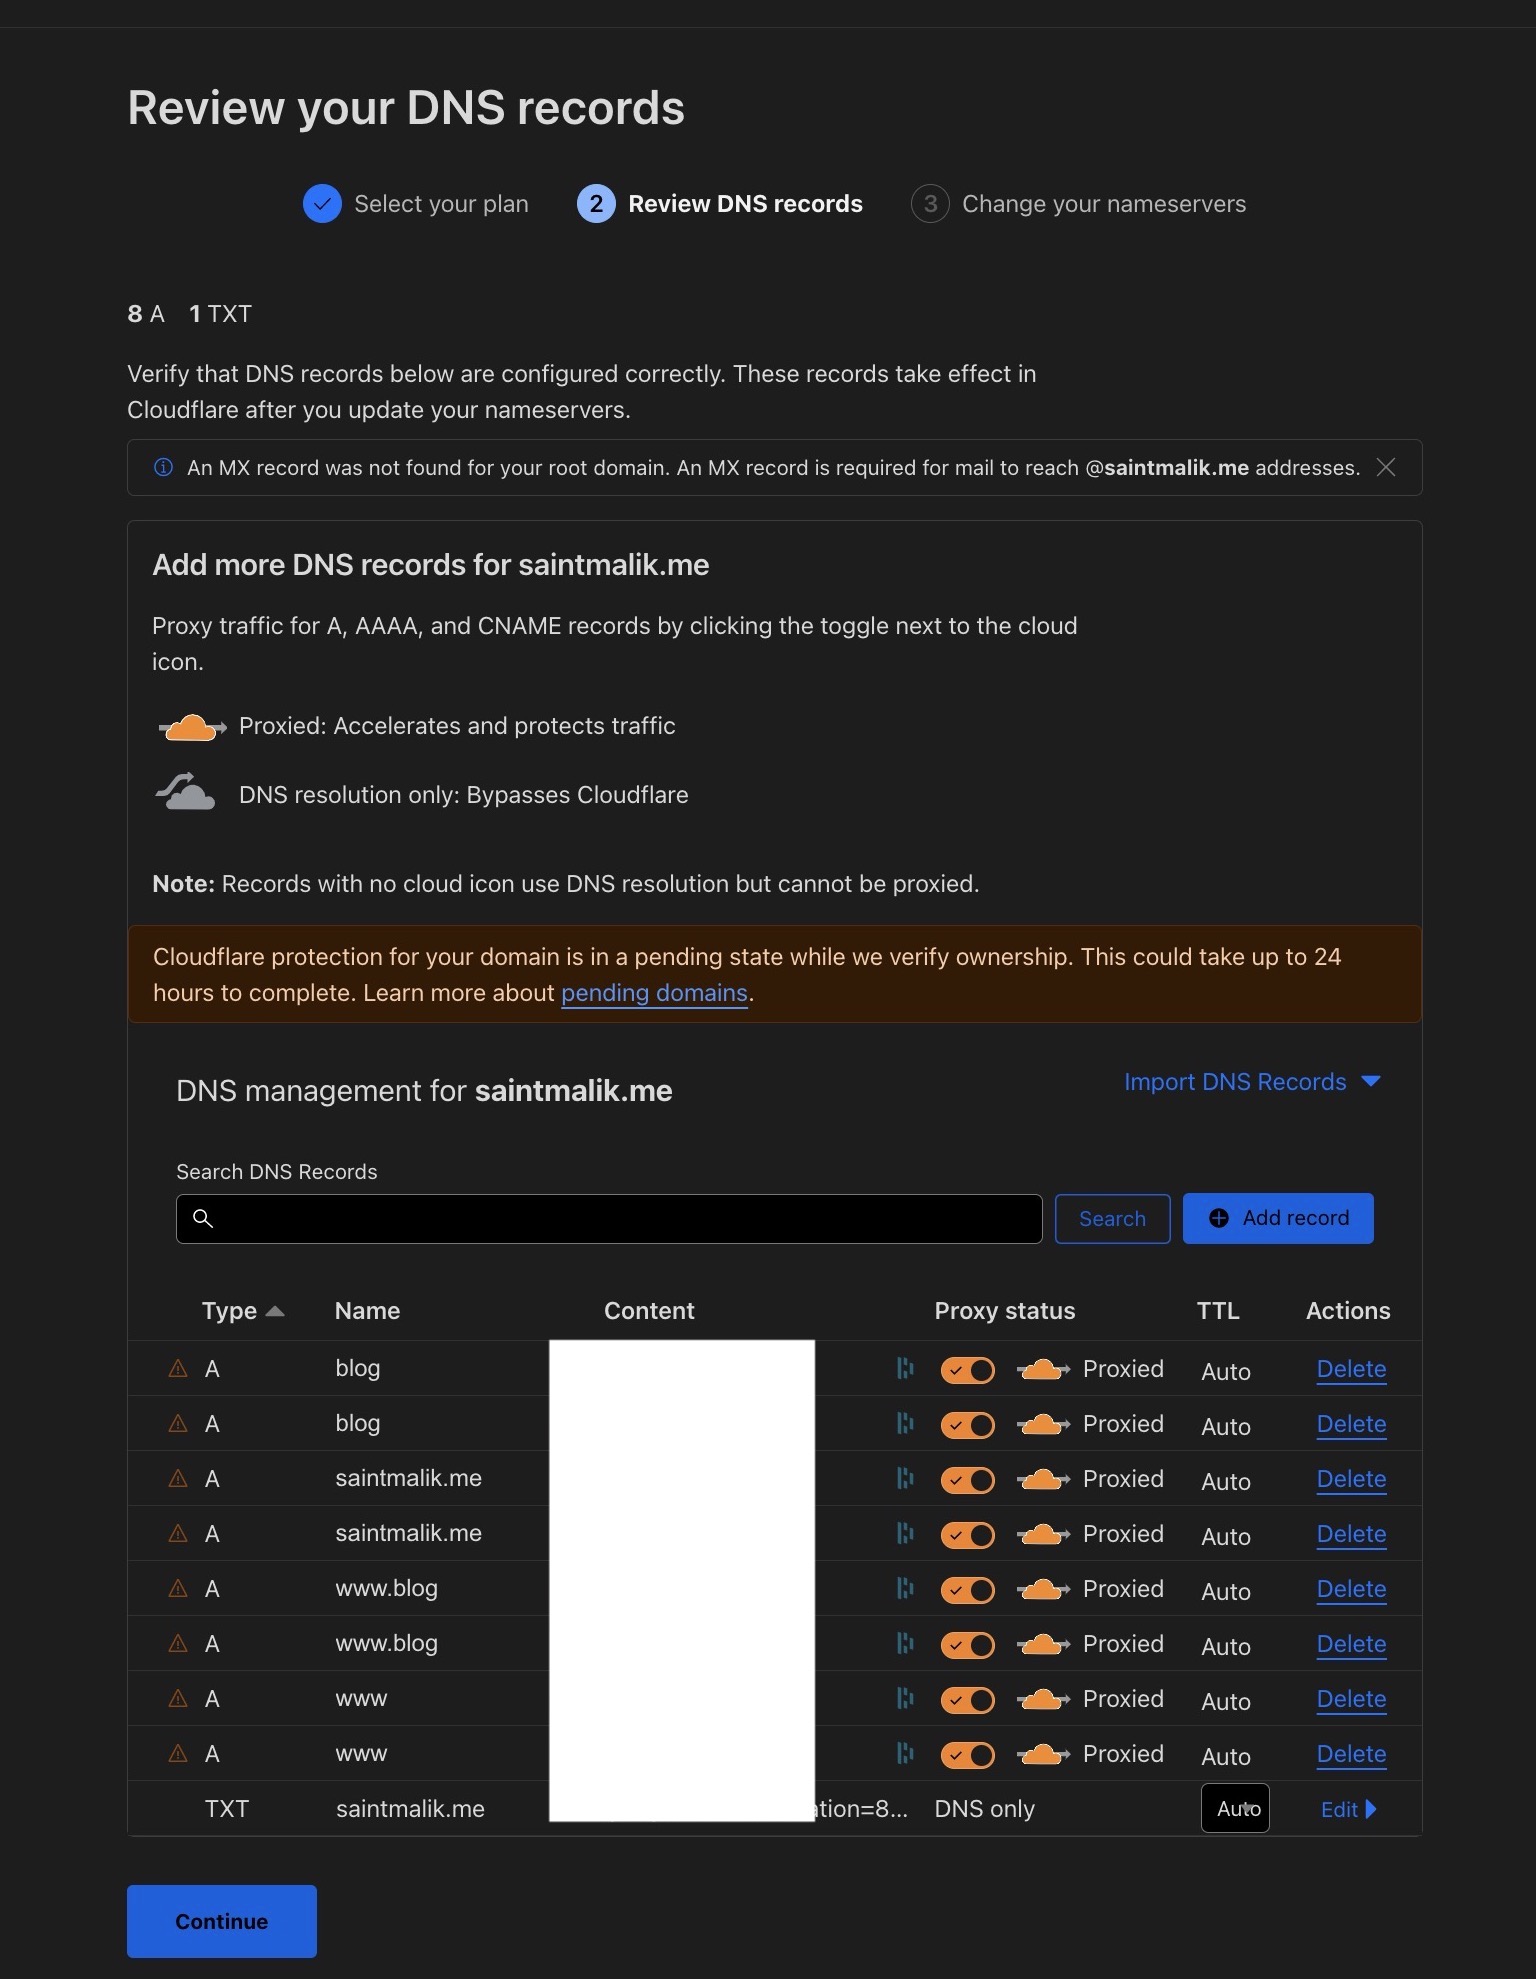
If you already have DNS records configured for your domain, Cloudflare should find and import them for you. Review this information, and if it all looks correct, click Continue.
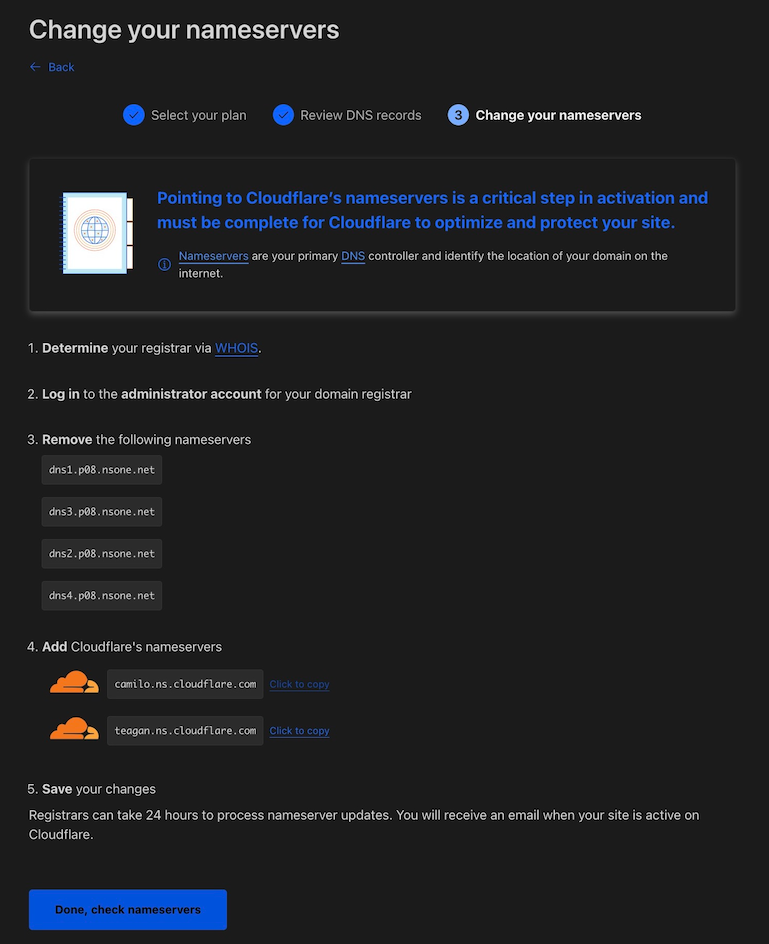
To fully move your website to Cloudflare, you'll need to change your nameservers from the current ones to Cloudflare's nameservers. The specific steps vary depending on where your domain is registered, but this typically involves signing in to your domain registrar account, where you usually find a setting for nameservers. Follow the instructions provided by Cloudflare to update these to the appropriate values:
When your DNS propagation finalizes, you should see a success message. The time that this process can take varies, anywhere from minutes to a couple of days depending on how your registrar handles nameserver updates. Cloudflare will send you an email when the change is complete.
Configure speed settings on Cloudflare
Now let’s set up the speed settings on Cloudflare to improve your web performance. Hover over Speed in the sidebar of your Cloudflare dashboard and click Optimization. You should see a variety of options, including Auto Minify, Brotli, Early Hints, and Rocket Loader.
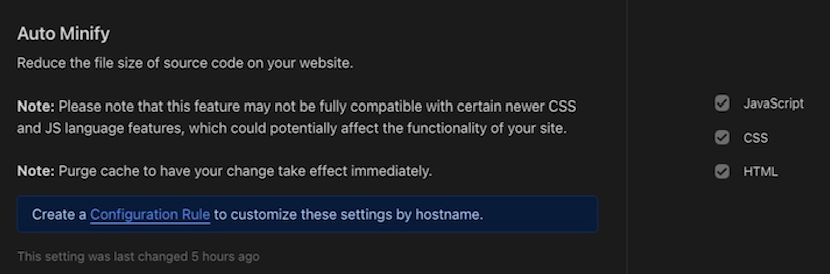
Auto Minify
With Auto Minify, you can minify and reduce the sizes of your HTML, CSS, and JavaScript files, allowing your content to load more quickly.
Brotli
Enabling Brotli compression can speed up your content’s load times. This option compresses the HTTP response so that it can load faster.

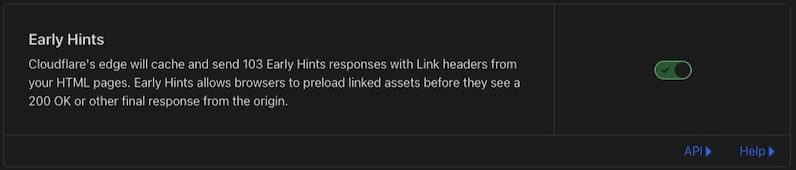
Early Hints
Early Hints optimize application delivery by caching all preload and preconnect hints in the Link headers and sending them as early hints to the client’s browser. Hints are sent to the browser with a 103 response code ahead of the full content, so the browser can figure out the best and fastest way to load any required resources.
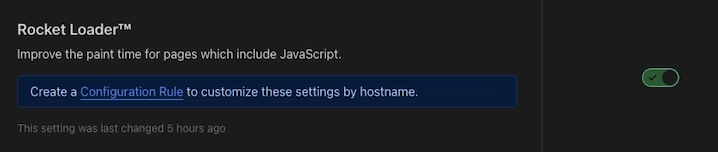
Rocket Loader
Third-party scripts like Google Analytics are typically out of your control and difficult to optimize. Rocket Loader allows you to automatically prioritize your website's content (text, images, fonts, and so on) and defer loading the full JavaScript until after rendering.
This mitigates the issue not just for large third-party scripts but for all scripts, leading to improvements in metrics like First Contentful Paint and Largest Contentful Paint.
In some cases, Rocket Loader’s automatic optimizations may increase layout shift on your page or break functionality on your website. Run a site speed test before and after optimizing Rocket Loader to see how the optimizations are working.
Configure cache settings on Cloudflare
Cache settings allow you to control the specifics of how caching will be applied to your content. In Cloudflare’s sidebar, hover over Caching and click Configurations.
Cache level
The cache level setting helps Cloudflare determine what content on your website it should cache. For example, you can write a rule for Cloudflare to cache HTML content and every other content type.
To do this, click Rules in Cloudflare’s sidebar, then click Page Rules.
Enter your website's URL and add /* to the end (as in example.com/*). Click Add a Setting, pick the Cache Level settings, select the Cache Everything cache level option, and save the page rule.
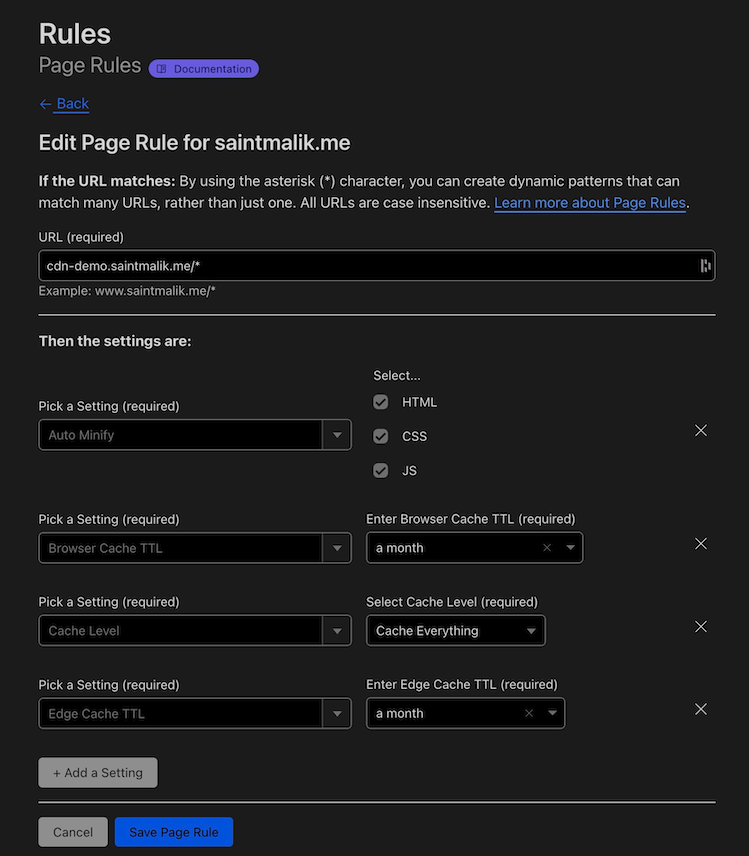
Edge cache TTL (Time-to-live)
Cloudflare defaults its edge cache duration to match your origin server's cache-control header. If your origin server's caching directive is set to private, no-cache, or max-age=0, or the site has cookies, then Cloudflare won't cache that content. If your origin server's Cache-Control header is set to public and the max-age value is set above 0, then Cloudflare will cache that content.
With Edge Cache TTL, you can override your origin server's cache control. In the previous screenshot, you can see that the Edge Cache TTL value has been set to a month. With this setting, Cloudflare would cache, hold, and serve web content for a month, as long you don't manually purge the cache from Cloudflare.
Once you’re done making changes, test your website to see if all settings have taken effect. In Chrome, right-click anywhere on the page and click Inspect to open the browser developer tools.
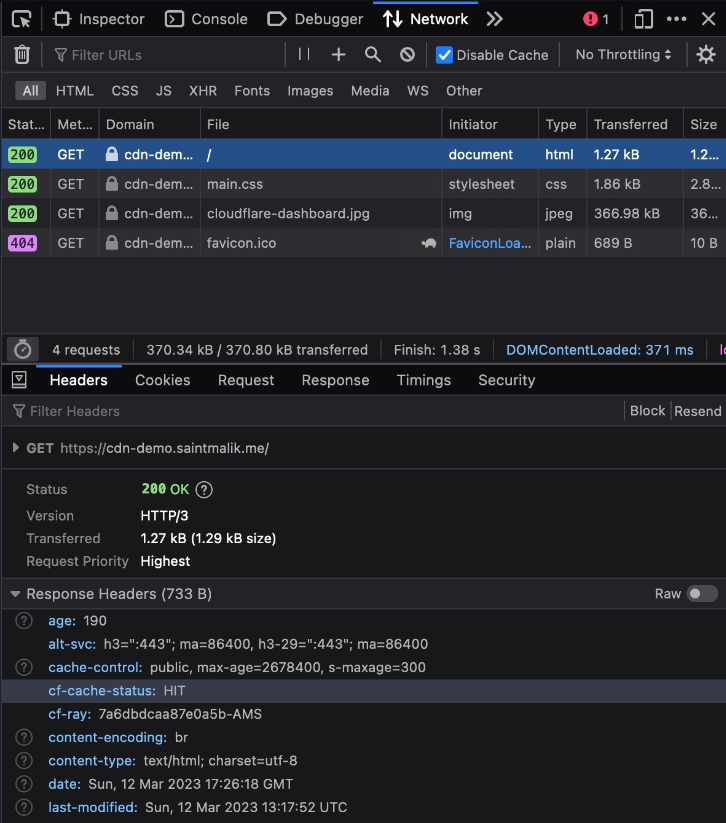
As in the screenshot, the website's Response Headers section should show the cf-cache-status value as HIT. That means content is being shared straight from the Cloudflare CDN cache.
If the value is MISS, it means the Cloudflare CDN can't find that content in its cache. Instead, the content is served from your origin server. Next time the page is visited it should show HIT.
Using these options, you can configure CDN caching for static sites with ease. However, this approach isn’t entirely suitable for dynamic applications that depend on backend servers to execute logic. Leveraging CDNs for dynamic content has traditionally been a challenge for web applications, given that dynamic data changes frequently. But with tools like Cloudflare Workers, you can shift your business logic closer to the edge and move the time-consuming initial connection closer to the end user.
Host and distribute websites using Cloudflare Workers�
Cloudflare Workers is a serverless platform that allows you to run serverless code without slow cold starts. It essentially enables you to keep the code that builds your dynamic content physically closer to your end user.
This helps your application scale automatically and serve your users faster through the Cloudflare global CDN network. Cloudflare Workers handles all the server maintenance and can run different types of applications, ranging from Rust to C++ and Node.js.
Let’s take a quick look at how to deploy websites on Cloudflare Workers while we’re at it.
Prerequisites
Before continuing, make sure you have all of the following in place:
- The demo Node.js router app, which you can find among the Cloudflare Workers Quickstart examples
- A Cloudflare account
- Node.js and
npminstalled
Activating Cloudflare Workers on your account
In Cloudflare’s sidebar, click Workers. Enter a subdomain where prompted on the following page; this will be the domain where your workers will be accessible.
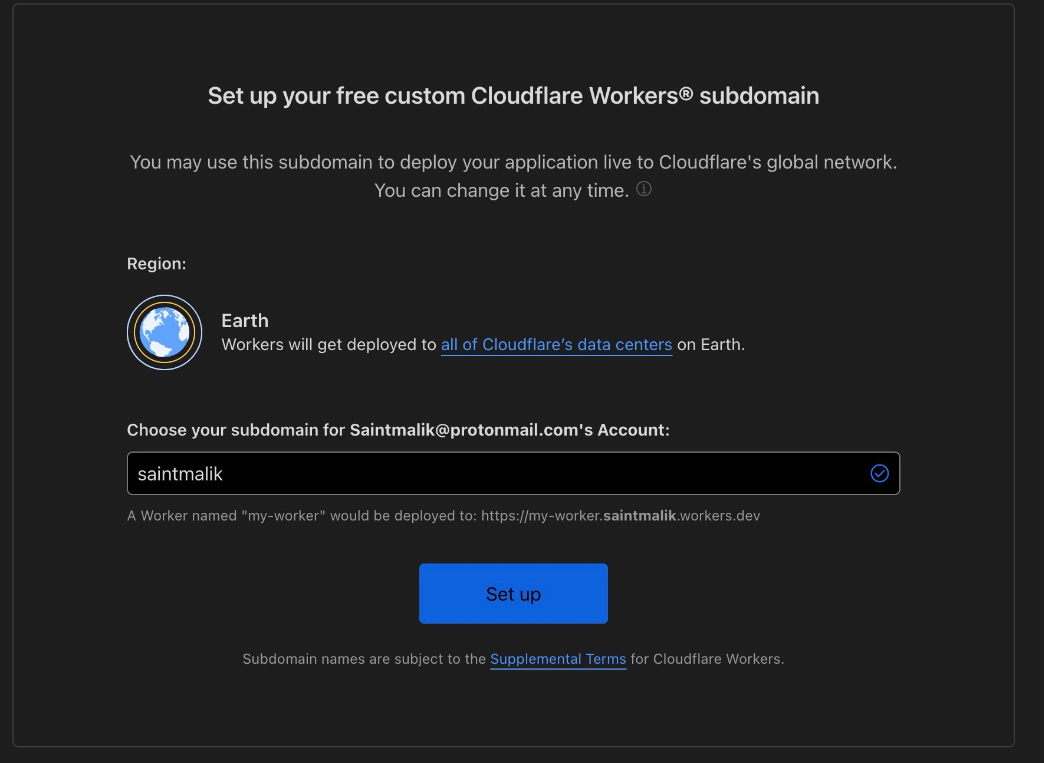
After entering the subdomain, click Set up.
The next screen prompts you to select a plan for Cloudflare Workers. You can select the free plan for the purposes of this tutorial.
Installing the CLI tool
To interact with Cloudflare Workers from your computer, you'll need a command line interface (CLI) tool. To install the CLI tool Wrangler, run the following command:
npm install -g wrangler
Once it’s installed, authenticate Wrangler with your Cloudflare account:
wrangler login
A new page opens in your browser, asking for permission to allow Wrangler to access your Cloudflare account:
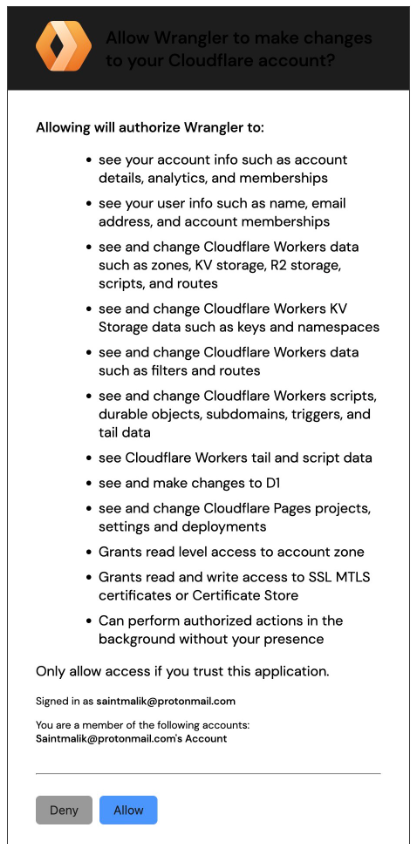
Click Allow, and you should get a response in your CLI saying that you're successfully logged in.
To create the demo app mentioned in the prerequisites on your local system using Wrangler, run the following command:
wrangler generate worker-demo worker-router
Navigate to the worker-demo folder you just created and run npm install to install the required dependencies for the application. Once the installation is complete, run the following command to start a localhost server for the demo app:
wrangler dev
The command should produce the following output:
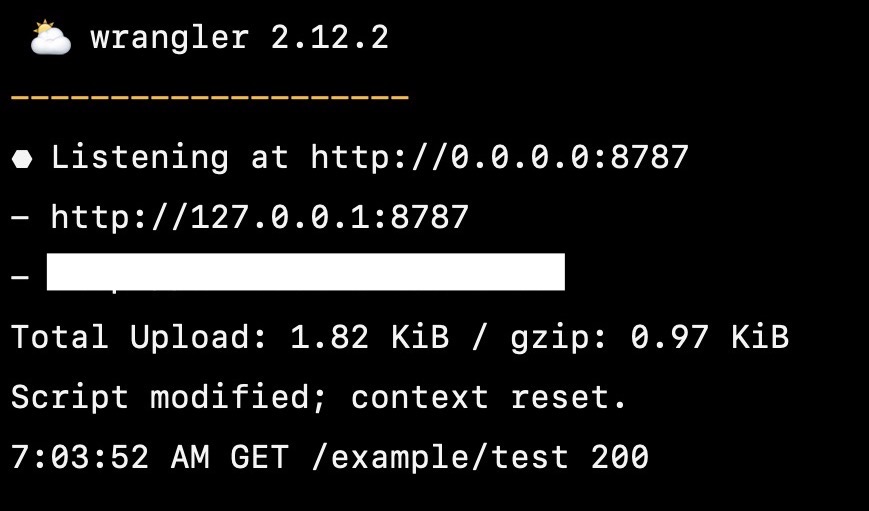
To view and test the demo application that you just started on the localhost server, navigate to http://localhost:8787/example/test in your browser. You'll see a Base64 encoding of the text test, taken from the URL path.

If you change the URL path from test to anything else, the Base64-encoded value should change accordingly.
You've tested the demo app locally, and it works. Now, you can deploy and publish it using the Wrangler CLI on Cloudflare Workers. Run the following command:
wrangler publish
Assuming everything goes smoothly, you should see an output identical to what's shown in the following image, along with a URL to access the site:
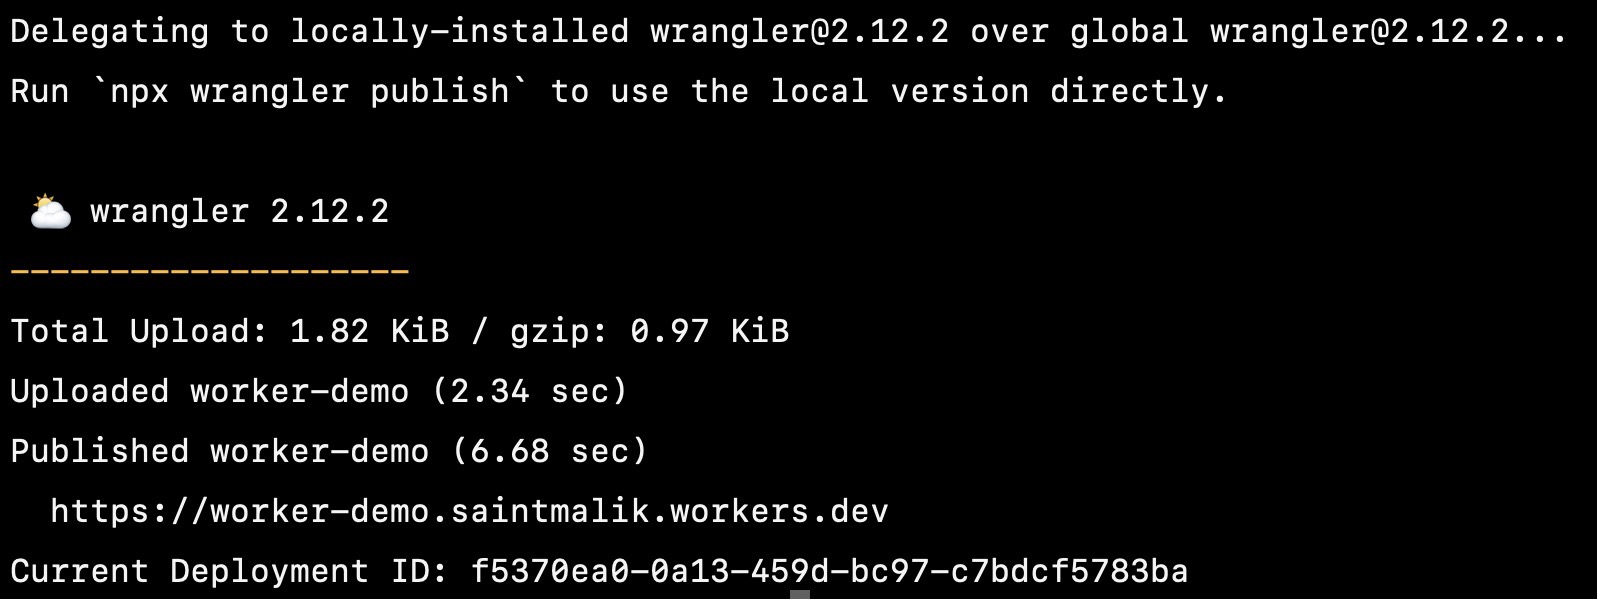
Note that your deployed app's URL should look something like
https://worker-demo.YOURSUBDOMAINNAME.workers.dev, and you should replaceYOURSUBDOMAINNAMEwith the name you entered earlier.
At this point, your demo app is built and deployed across all Cloudflare edge servers. You can confirm this by adding /cdn-cgi/trace to your deployed app's URL.
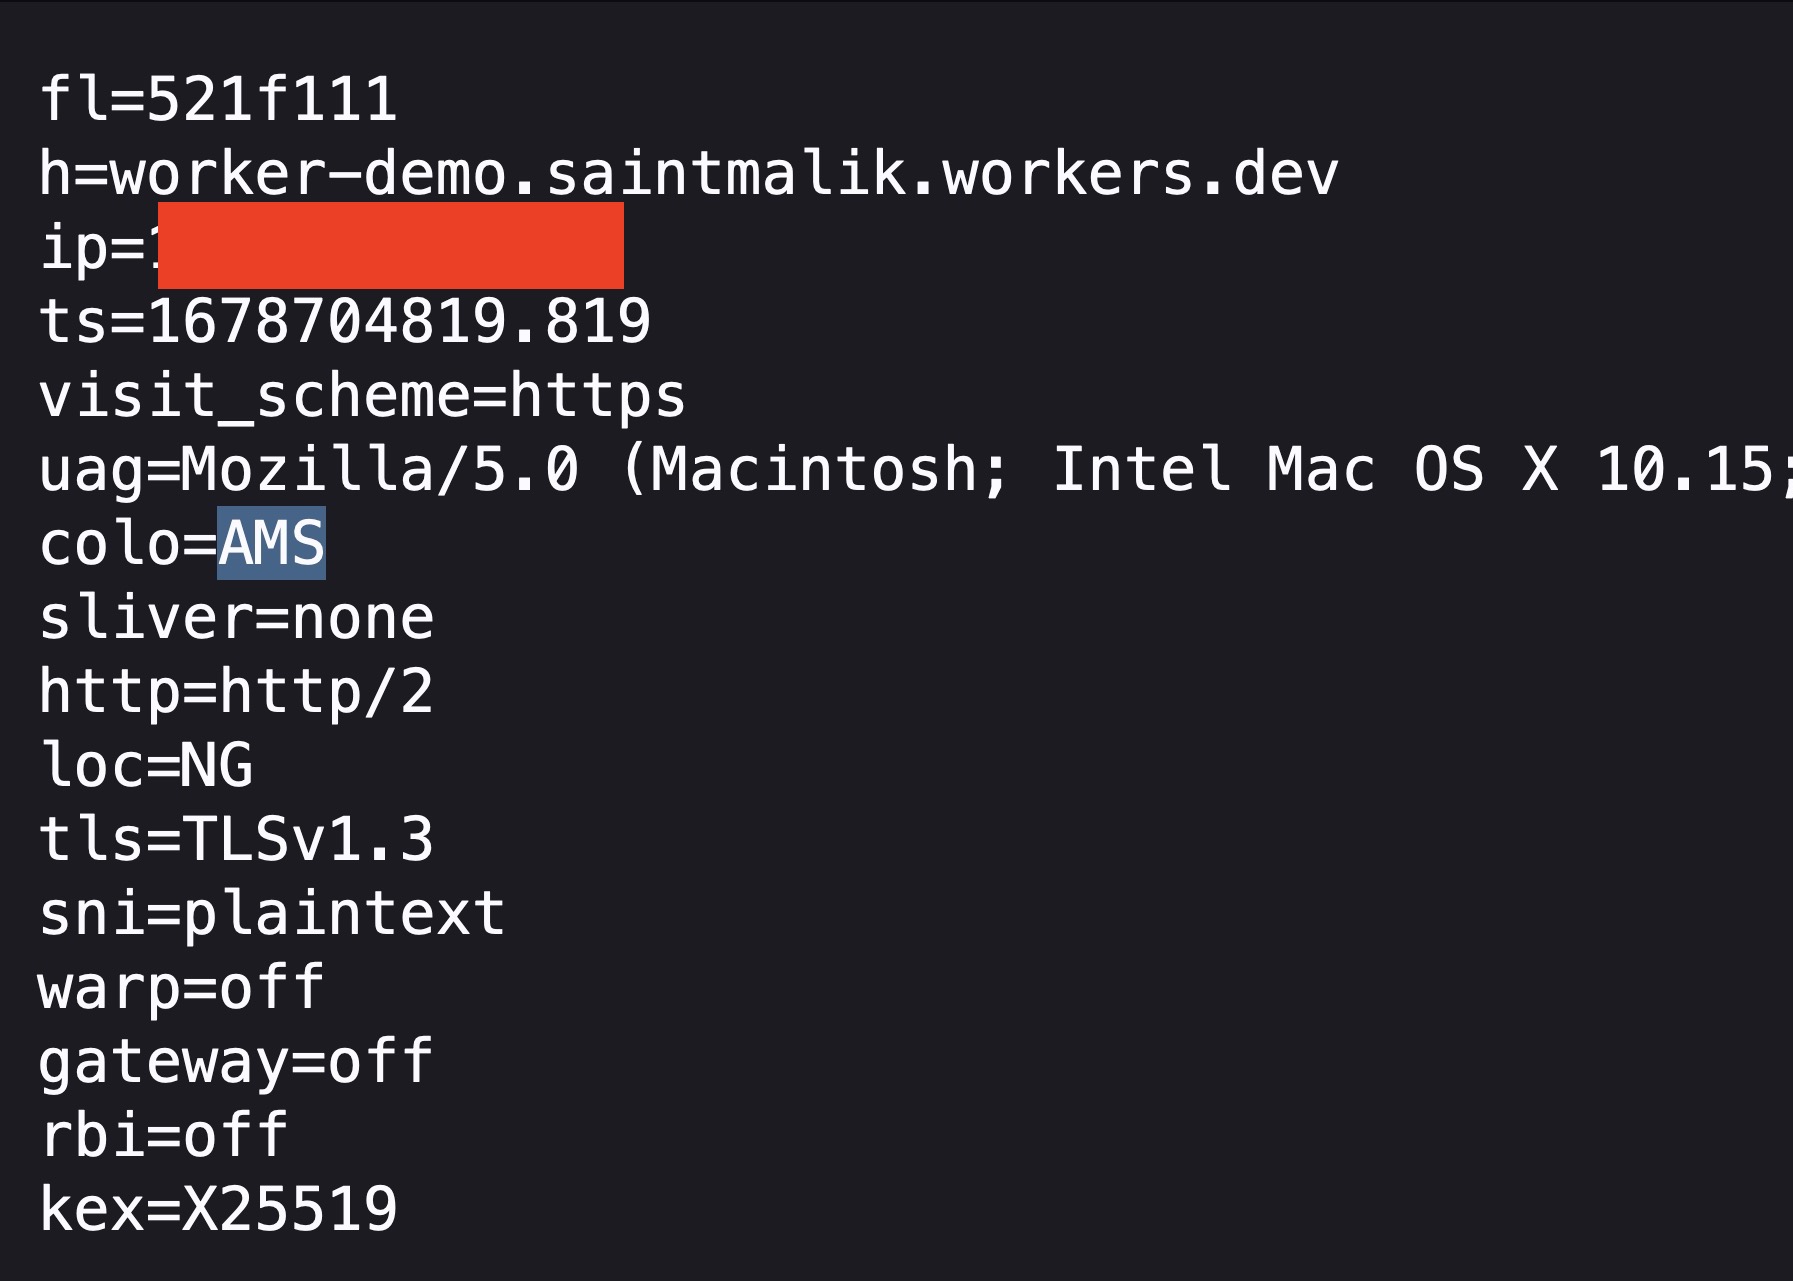
In this example, the edge server serving the content is colo=AMS, identifying the Amsterdam edge servers. This is the closest server to where the tutorial was originally completed. Yours will be different depending on your location.
Conclusion
Now you know how to configure Cloudflare settings to improve your website's performance, as well as how to host and distribute your web applications on CDNs with Cloudflare Workers.
Of course there's more to a fast website than serving requested resources quickly. Run a free site speed test to see how your website is doing. Or sign up for a 14-day DebugBear trial to monitor performance over time, including from your real world users.


Monitor Page Speed & Core Web Vitals
DebugBear monitoring includes:
- In-depth Page Speed Reports
- Automated Recommendations
- Real User Analytics Data