Set up web performance monitoring alerts
You can set up alerts to get notified about performance regressions and stay on top of your team's web performance efforts.
This guide explains how to configure notification channels and messages to different channels.
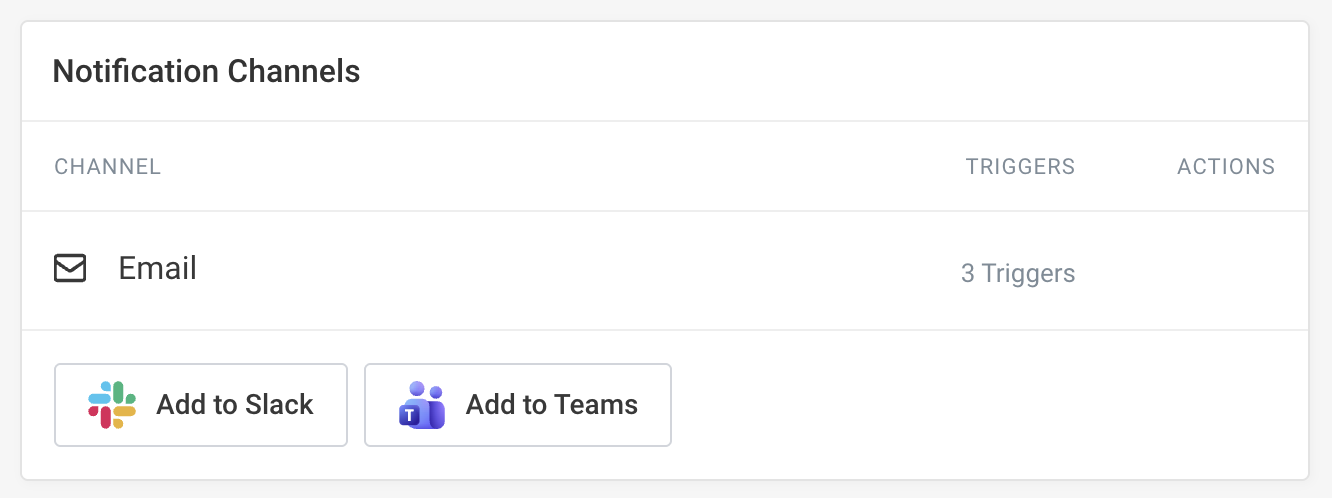
Notification channels
Channels are where your alert messages show up. You can send alerts to the following channels:
- Slack
- Microsoft Teams
Add a channel integration
Follow these steps to add a new channel:
- Select Integrations in the sidebar
- Click on Add to Slack or Add to Teams
You'll then be prompted to complete the setup for the integration you've selected.
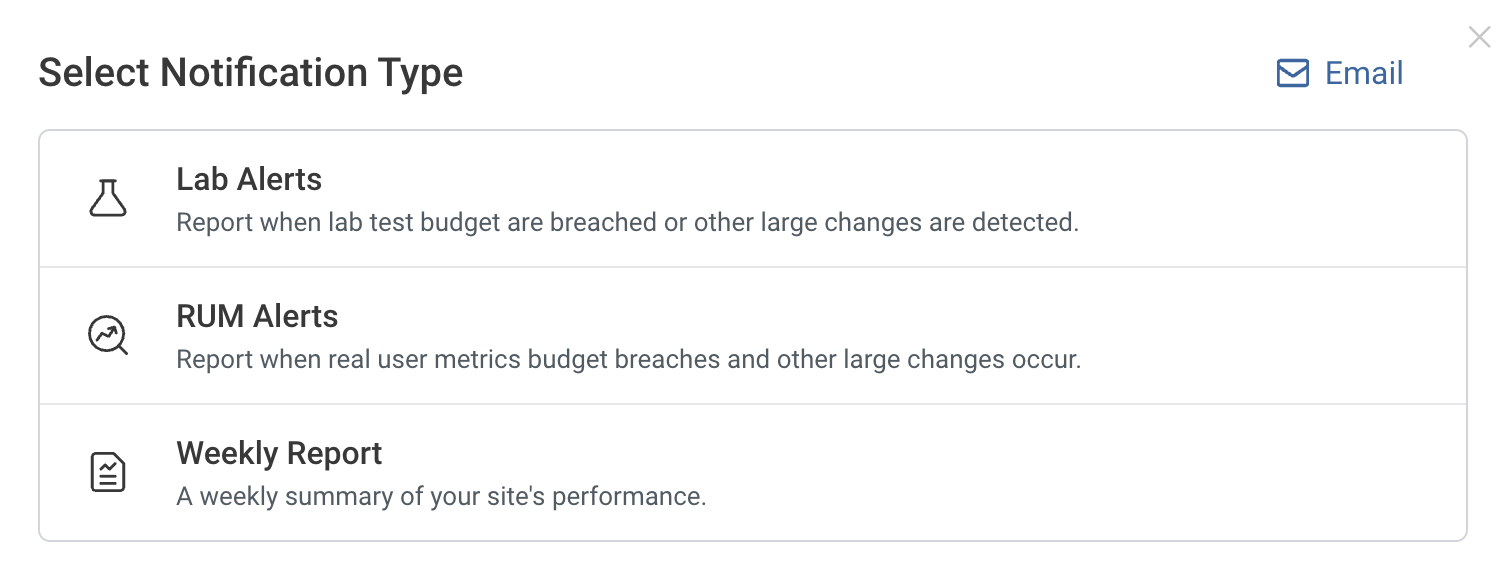
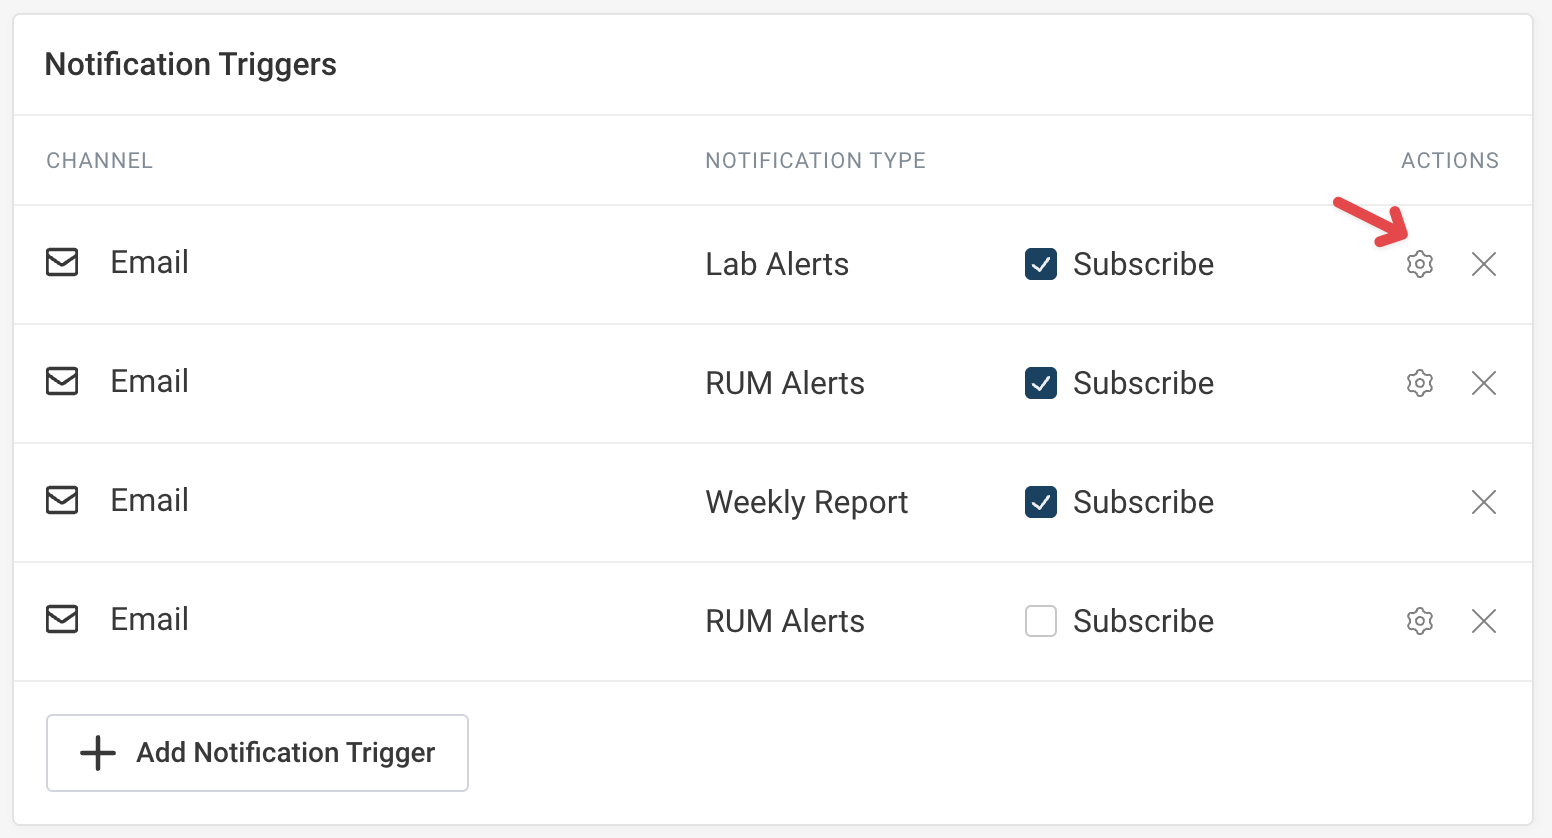
Notification triggers
Depending on the integration type you've selected, the following trigger types are available:
- Lab Alerts: detect changes in your synthetic monitoring data
- RUM Alerts: detect changes in you real user monitoring data
- Weekly Report: get a scheduled weekly performance report
- JS File Size Changes: get alerted to bundle size changes or new third-party code
- API Builds: get notifications when custom API builds complete (with commit hash + custom environment)
Add a notification trigger
- On the integrations page, click on Add Notification Trigger.
- Select the channel you want to send the alert to.
- Select the type of trigger you want to set up.
Budgets and alert conditions
Before an alert is sent out the selected trigger needs to find. For example, to receive a notification for changes to you synthetic monitoring data, there needs to be a change that exceeds the alert threshold.
There are two types of alert conditions:
- Custom performance budgets
- Automatic alerting
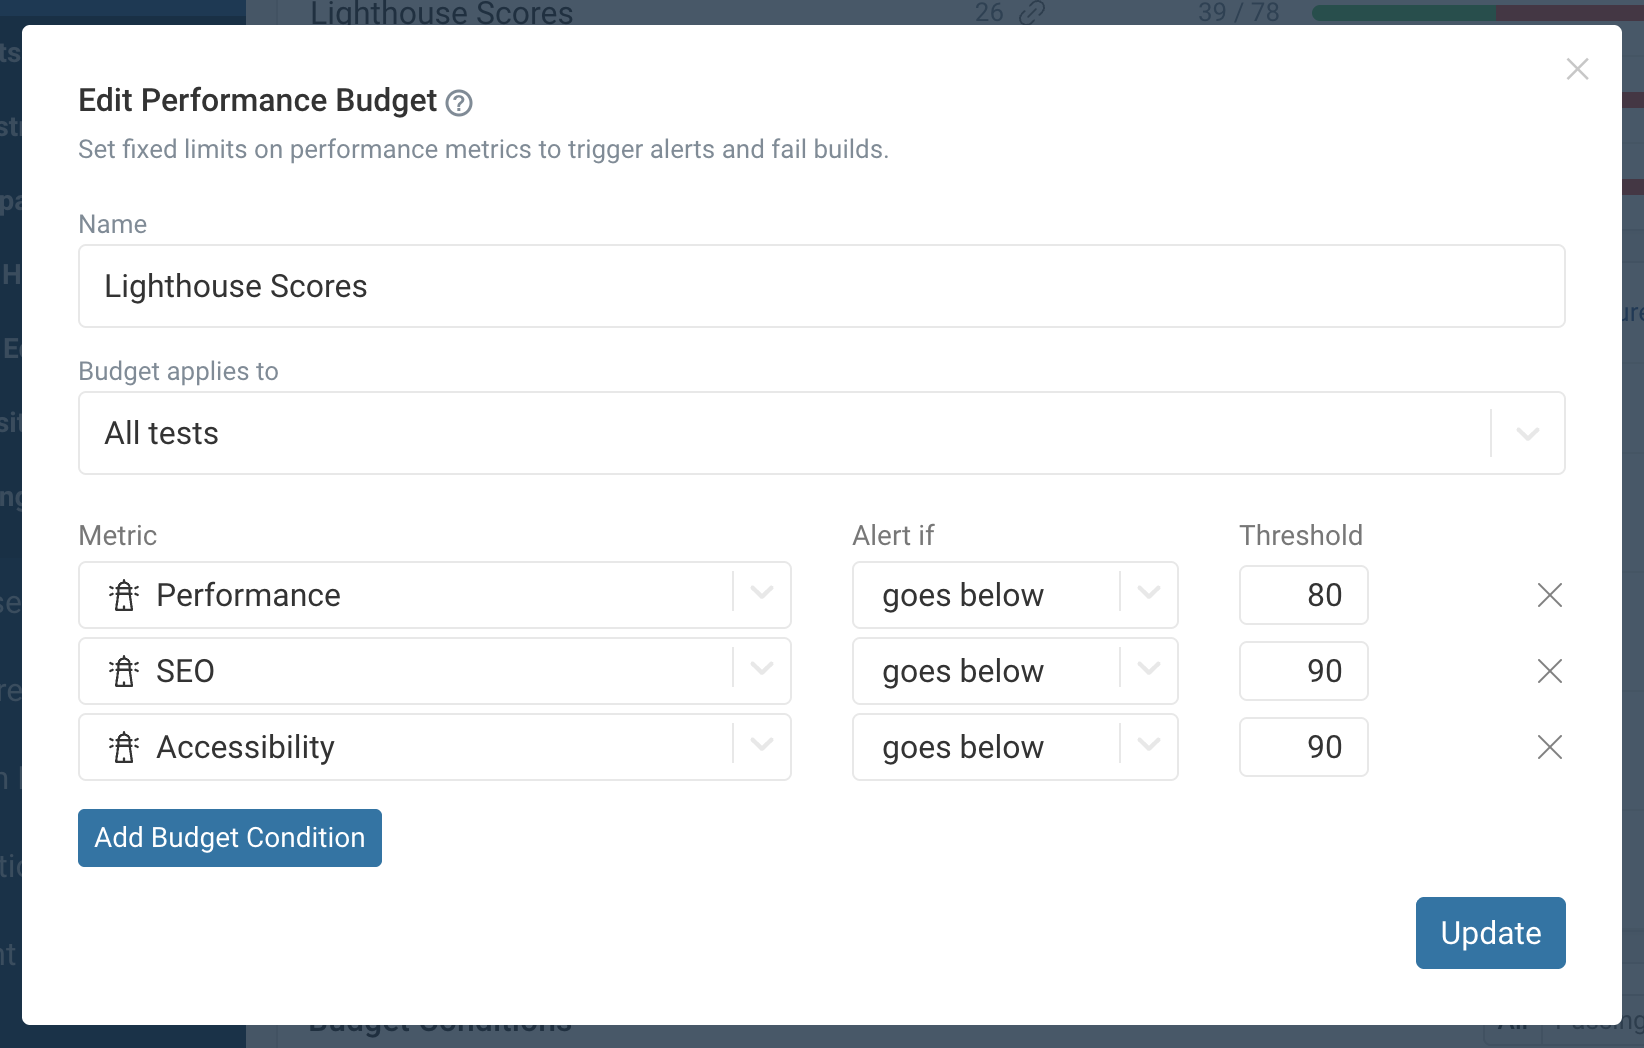
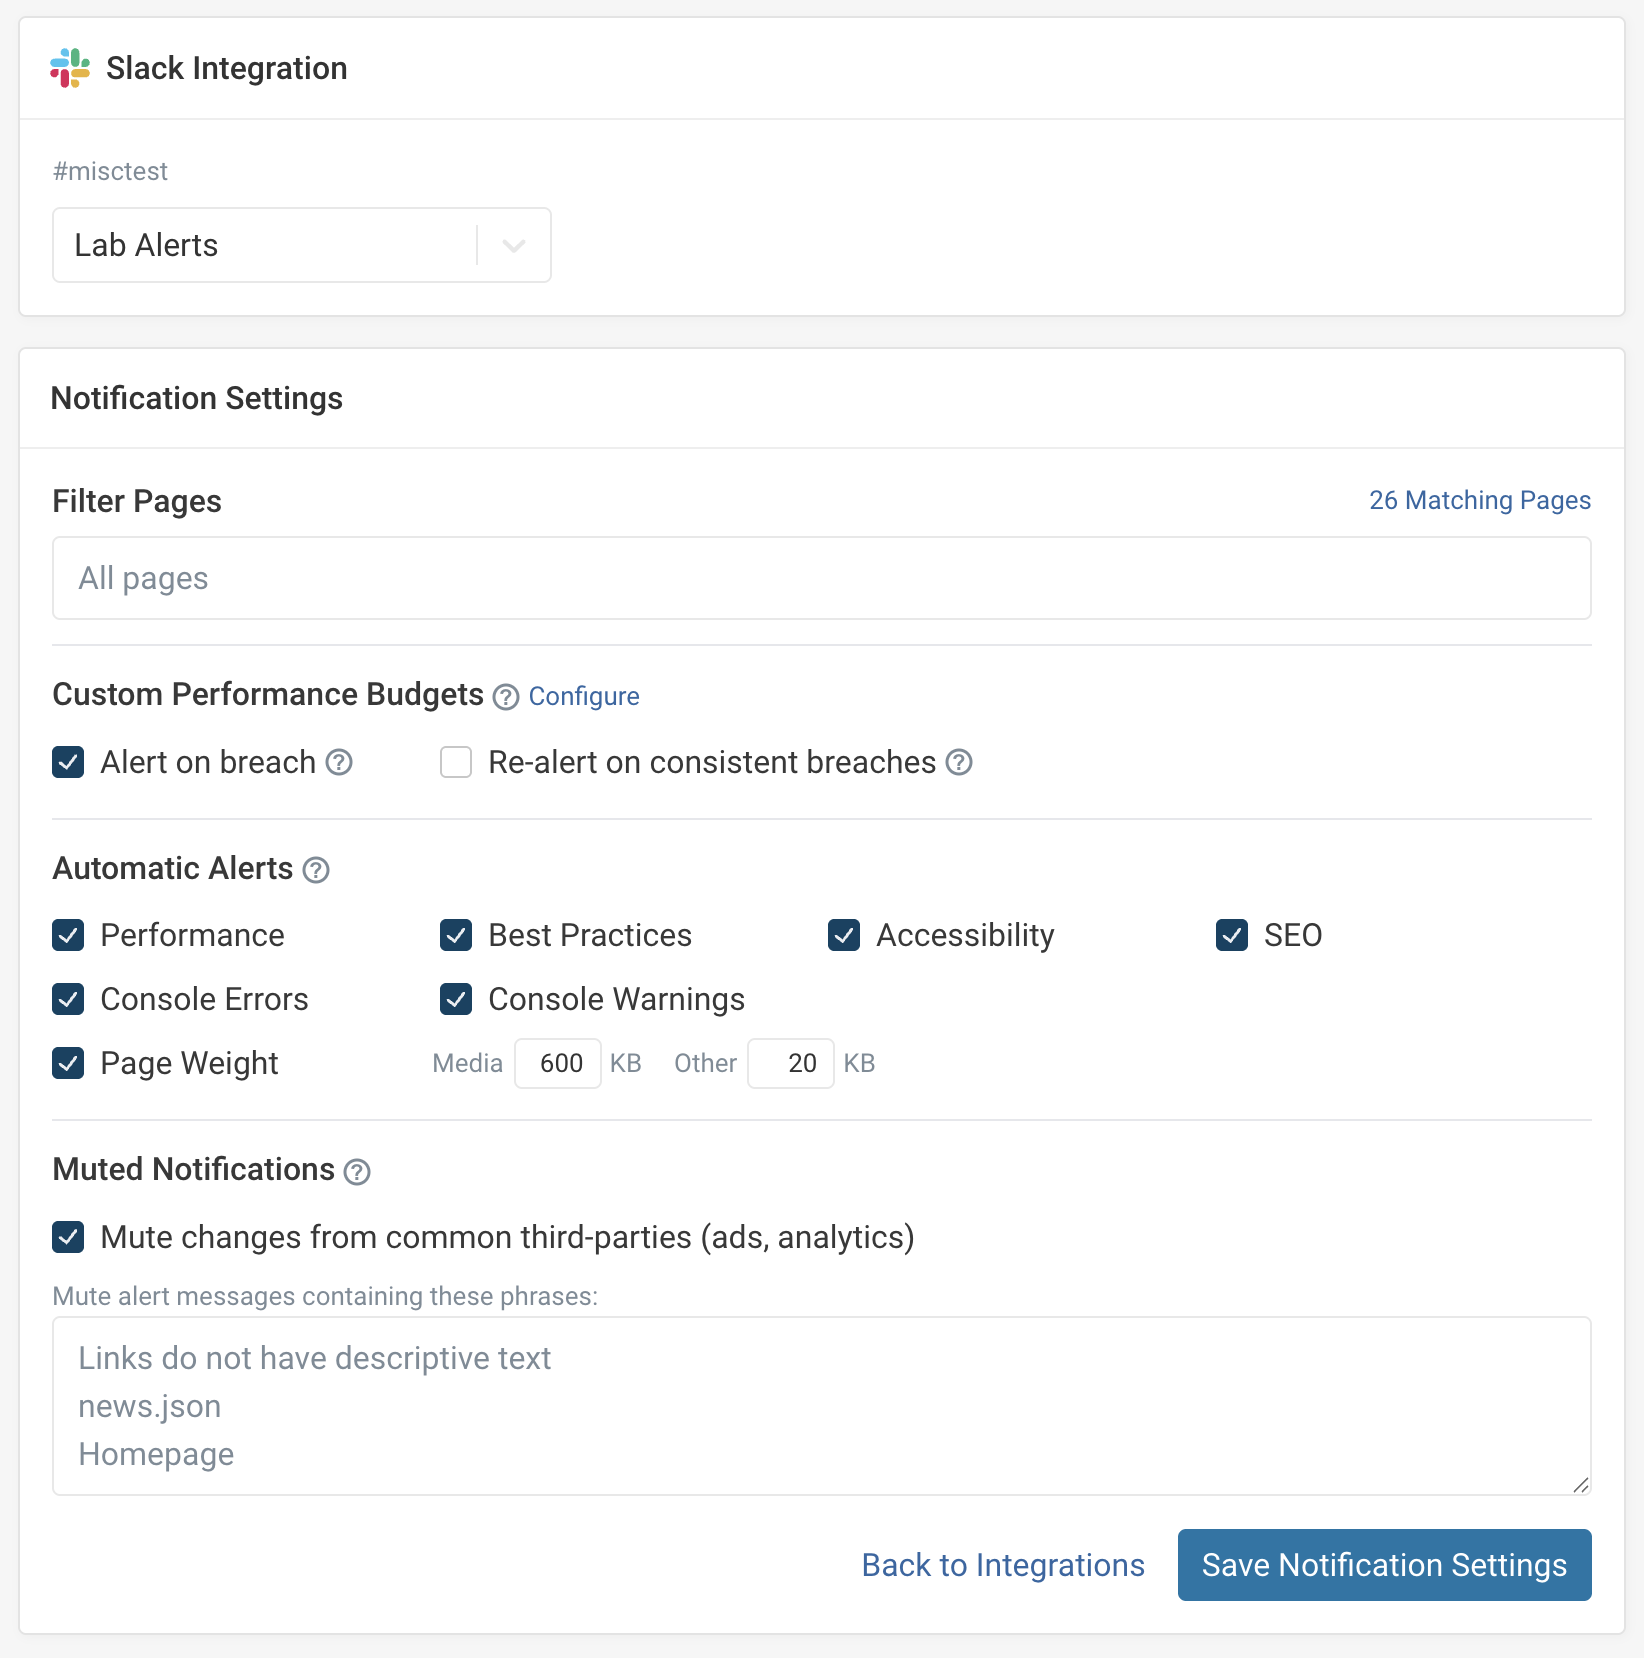
Custom performance budgets
You can define custom alert conditions using performance budgets. You can create synthetic monitoring budgets and real user monitoring budgets.
For example, this screenshot shows the synthetic monitoring budgets dashboard.
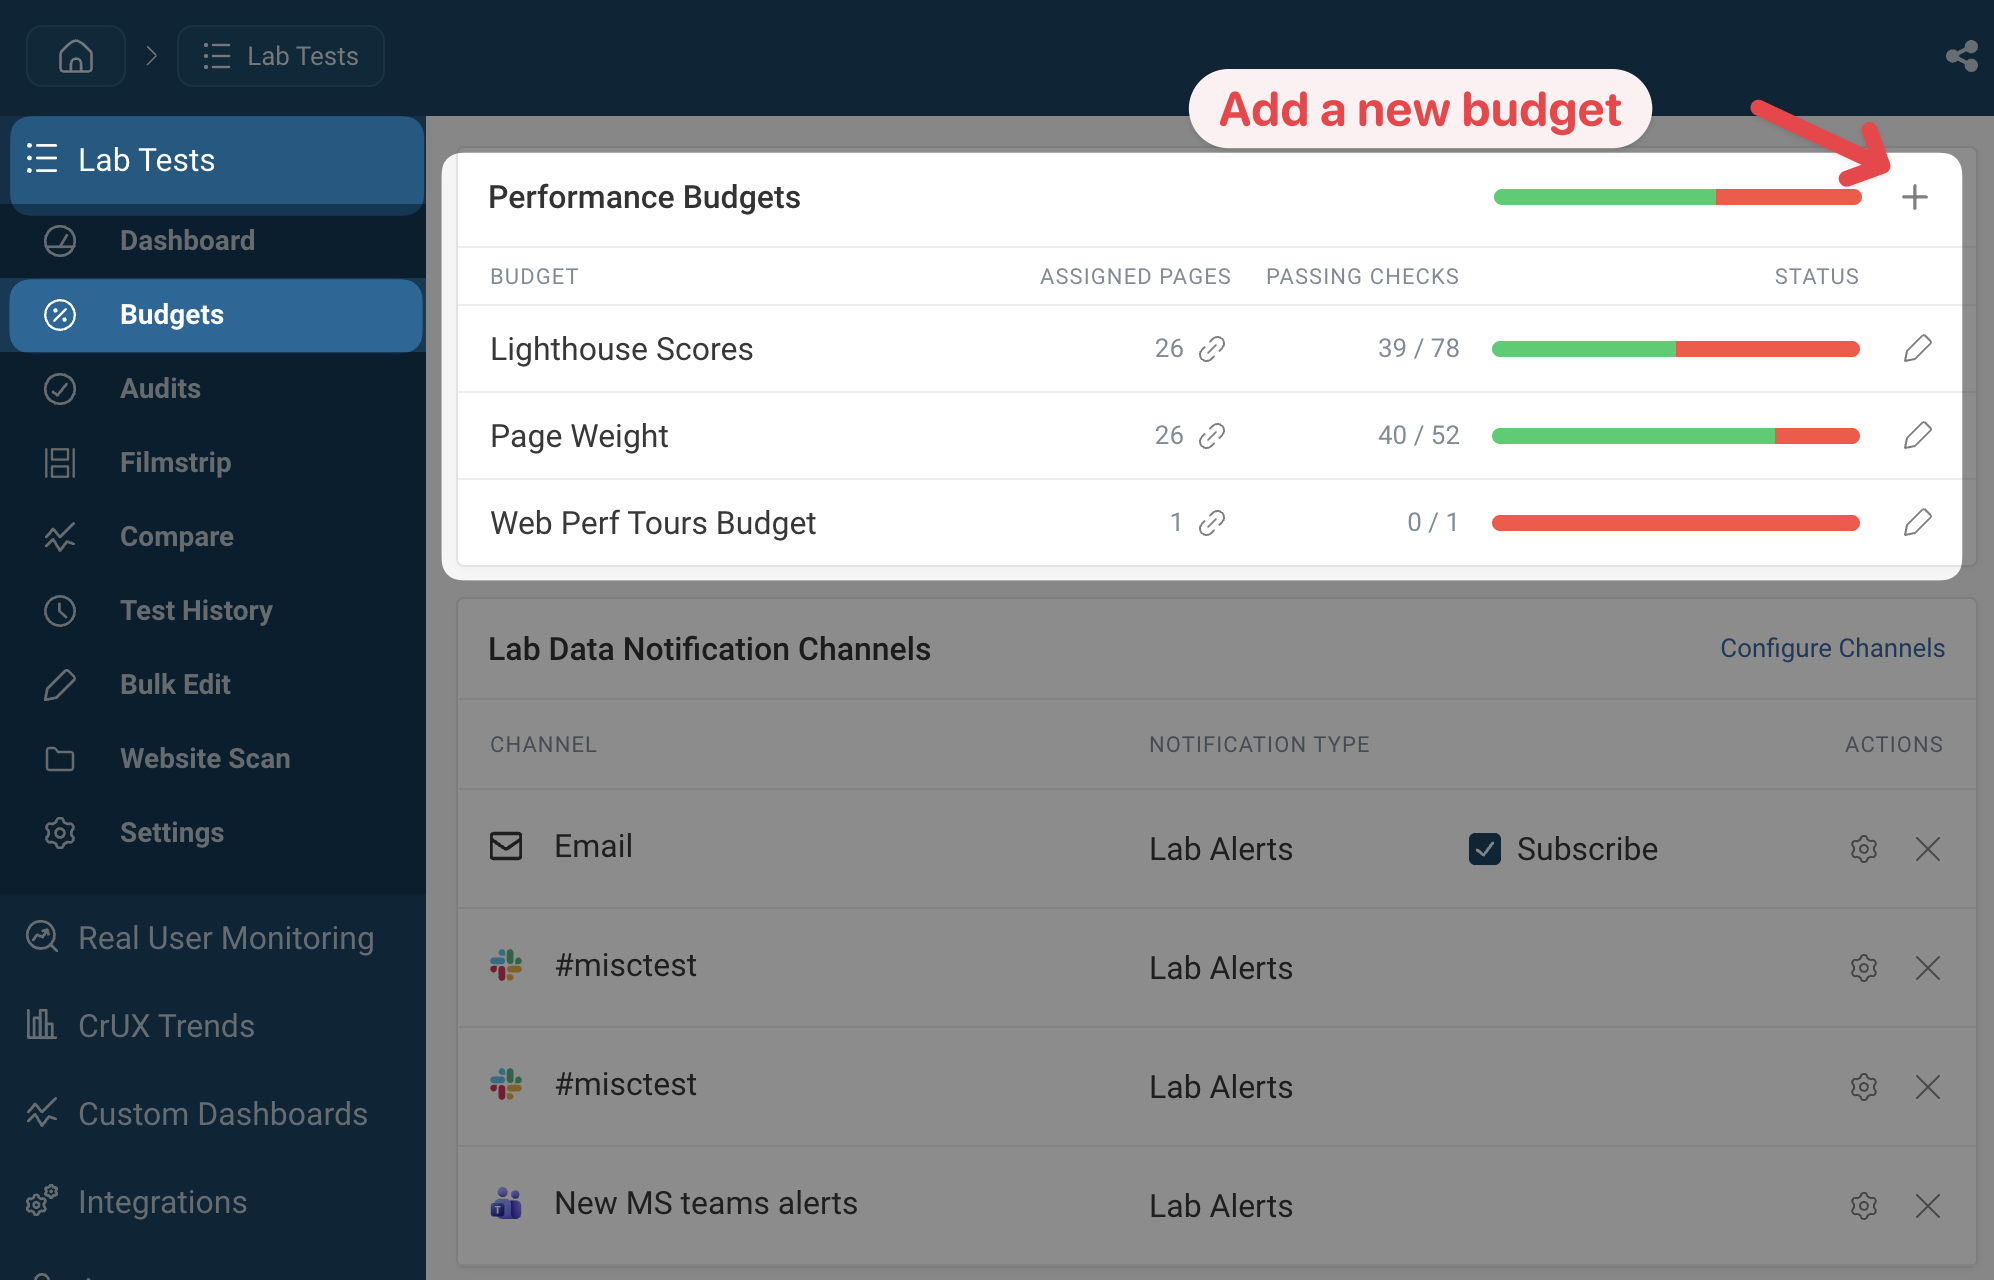
When editing a budget, you can define the metric that triggers the alert, select an absolute or relative change condition, and define the threshold value for the alert.
Automatic alerting
When you first set up your account you'll only receive automatic alerts when significant changes are detected on your website.
You can disable or customize these alerts when editing the notification trigger. Click on the gear icon next to the trigger to view the settings.
You can then adjust the categories and sensitivity of automatic alerts. For example, you can choose not to receive alerts for console warnings or changes in your SEO score. You can also adjust how large a page weight increase needs to be before an alert is sent out.
Additional alert settings
Let's look at some additional settings you can configure for your alerts.
Re-alerting
If re-alerting is disable you'll only receive one notification message, the first time the budget is breached. If you want to receive an alert with every test run you can enable re-alerting to keep issues top of mind for your team.
Re-alerting is disabled by default for email notifications. For Slack and Teams notifications, re-alerting is enabled by default.
Lab alerts page filter
It can be useful to ignore alerts for certain pages, for example if you monitor competitor websites or have different teams working in a project.
The filter options for synthetic monitoring alerts allows you to enter a search query to only receive alerts for matching pages. If you want to fully customize the list, consider adding a tag to the pages you want to include and then searching for [tag-name] in the filter.
Muting notifications
If you receive repetitive alerts about known or unfixable issues, you can mute notifications that contain a certain keyword.