Run JavaScript on the tested page
You can inject JavaScript code into the pages you test, for example to:
- Set a cookie that hides a GDPR notice
- Wait for a button to appear and click it
- Set a localStorage key that controls A/B tests
- Scroll down the page to load lazy loaded images
Read more about using script injection to script user journeys.
Writing and testing your script
The easiest way to make sure your script works is to open your page and run the script in the Chrome DevTools console.
If you use the waitFor and waitForElement functions you'll also need to inject this file into the console.
How to set up script injection
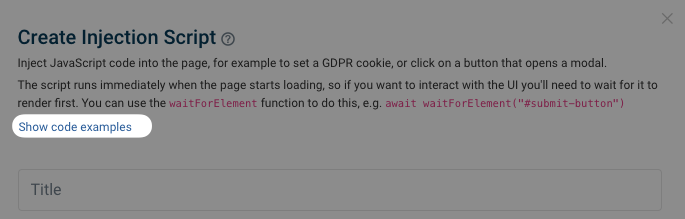
In the page settings, expand Advanced Settings and then select the Run JavaScript option.
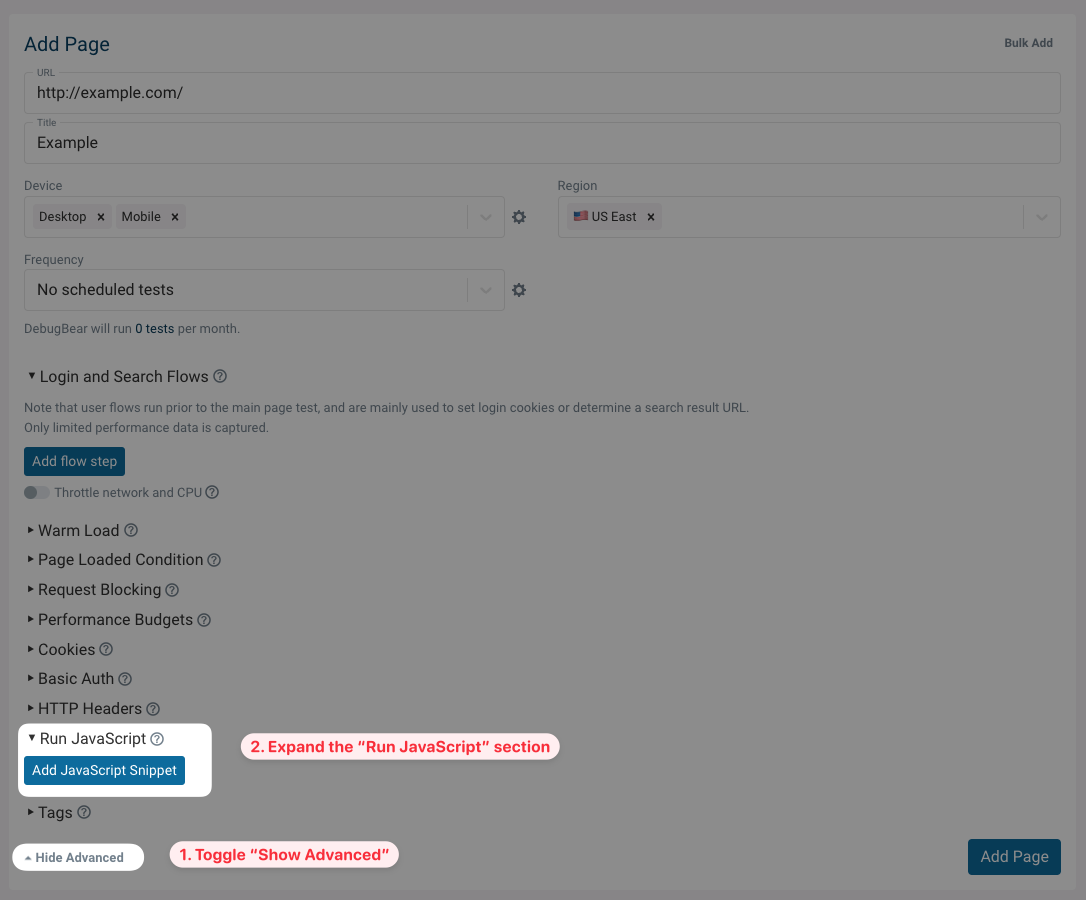
Click Add JavaScript Snippet and either select a previously created snippet or Create a new one.
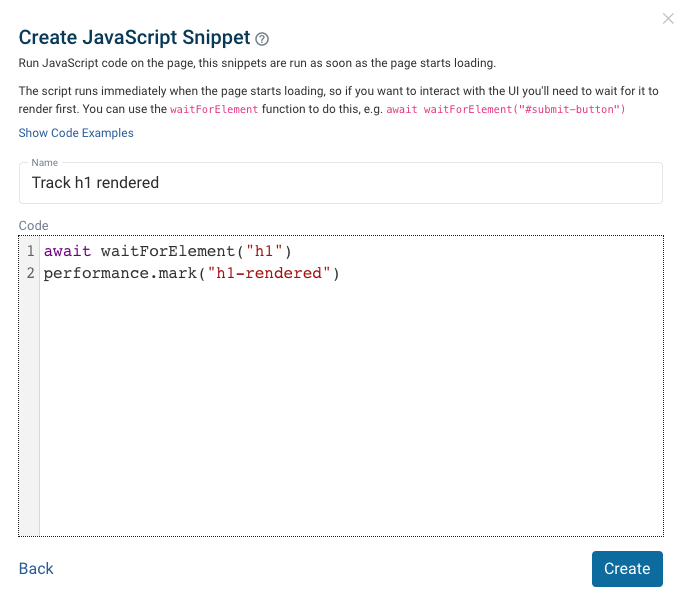
Pick a name for your snippet and write the code you want to run. Then click Create and save your page settings.
The script runs as soon as the page starts loading, so for example the body tag won't be present yet at that point. Use logic like await waitForElement("body") if you want to interact with page content.
Example scripts
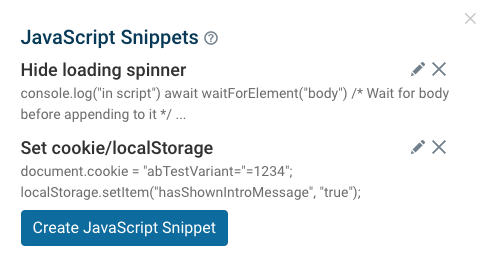
DebugBear provides a couple of common example scripts that you can use as a basis for your own code. Click on Show Code Examples to view them.
Select the script you want to use from the dropdown, then click Use this code snippet to prefill the form.
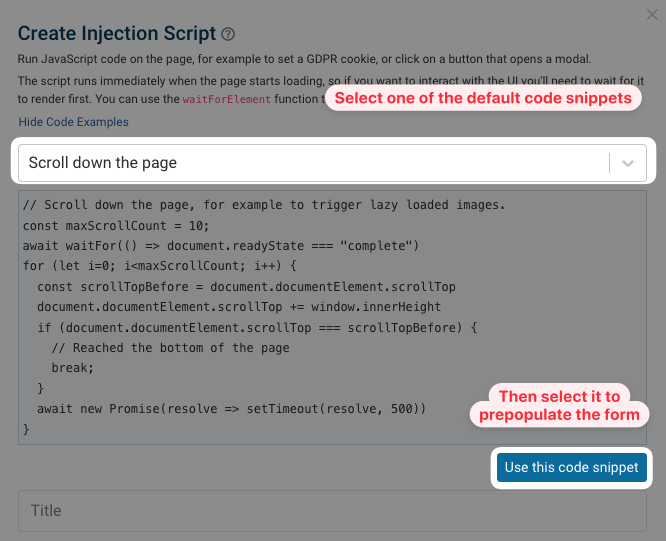
The following examples are currently available:
- Set cookie/localStorage
- Accept cookie banner
- Scroll down the page
- Custom timing metrics
- On-page user flow
- Hide loading spinner
Helper functions
The injected scripts run as soon as the document starts to load. If you want to interact with the DOM you'll need to first wait for the element to be rendered.
The waitForElement and waitFor helper functions make this easier, and are automatically available when running your scripts on DebugBear.
Use this file when testing your scripts in your browser's console.
waitForElement
This function returns a Promise that resolves when a given DOM element has been found. You can use async/await in your script, like this:
const btn = await waitForElement("#open-modal-button");
btn.click();
The containingText parameter lets you find an element whose textContent includes the given value. This is useful when the element doesn't have a unique selector.
const link = await waitForElement("a", { containingText: "My Account" });
link.click();
You can also pass the additional timeout and checkInterval options, which are described below.
waitFor
waitFor is a more generic version of waitForElement. It waits until a function returns a truthy value.
await waitFor(() => location.href.includes("/home"));
performance.mark("Navigated to home page");
waitFor works by checking the condition every 25ms. If the condition still isn't true after 15s then the promise is rejected.
You can customize this behavior using timeout and checkInterval.
await waitFor(() => document.title.includes("Homepage"), {
  timeout: 30000,
  checkInterval: 500,
});
Waiting for a condition can affect page performance if the condition is compute-intensive. If that's the case consider increasing the checkInterval.
Hiding spinners and animations
Chrome takes a screenshot every time the UI is updated, and if there are frequent UI updates it can hit the maximum of 450 screenshots.
This is often caused by spinners or other animated elements.
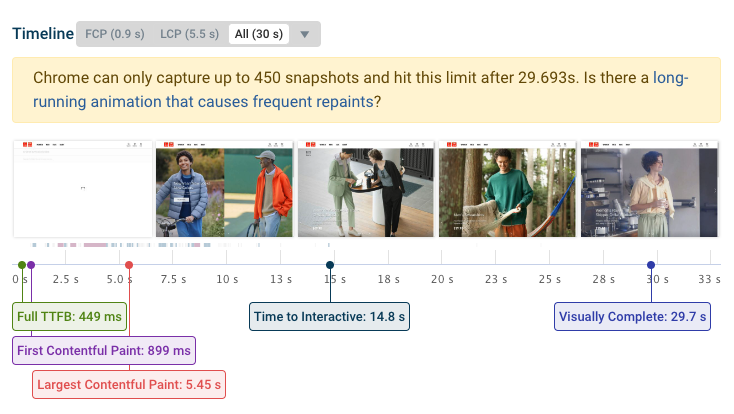
To avoid this and ensure the whole rendering process is captured you can disable the spinner. For example, you might want to run this script to hide it:
await waitForElement("body");
const style = document.createElement("style");
style.innerHTML = `.spinner { display: none }`;
document.documentElement.appendChild(style);
Or, maybe you can disable animations:
style.innerHTML = `*, *:before, *:after { animation: none !important; }`;
Ensuring tests run until the page has finished loading
By default, Lighthouse uses its own heuristics to decide when to conclude a performance test. However you can use JavaScript snippets to define your own criteria for when a test is complete.
Here are some cases when this can be useful:
- you have a dashboard that only starts rendering after a slow XHR request has finished
- you have a chat widget that loads late and sometimes isn't included in the test result, leading to variability in your performance score
To define a custom condition for when the page is loaded you can create a snippet like this:
await waitForElement("#main-page-content");
Or you could wait for a user timing to have been recorded:
await waitFor(() => performance.getEntriesByName("Application Initialized")[0]);
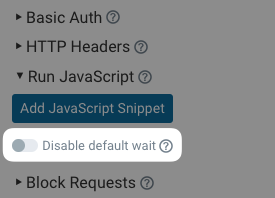
Disable default wait
By default Lighthouse and DebugBear wait for the network and CPU to become idle before finishing the test. In some cases this means the test will continue until it hits a timeout, for example if there's continuous CPU processing or many long-running network requests.
You can disable the default wait conditions and rely only on your own criterion defined in the JavaScript snippet.